Quick start guide

  • page
Guide  

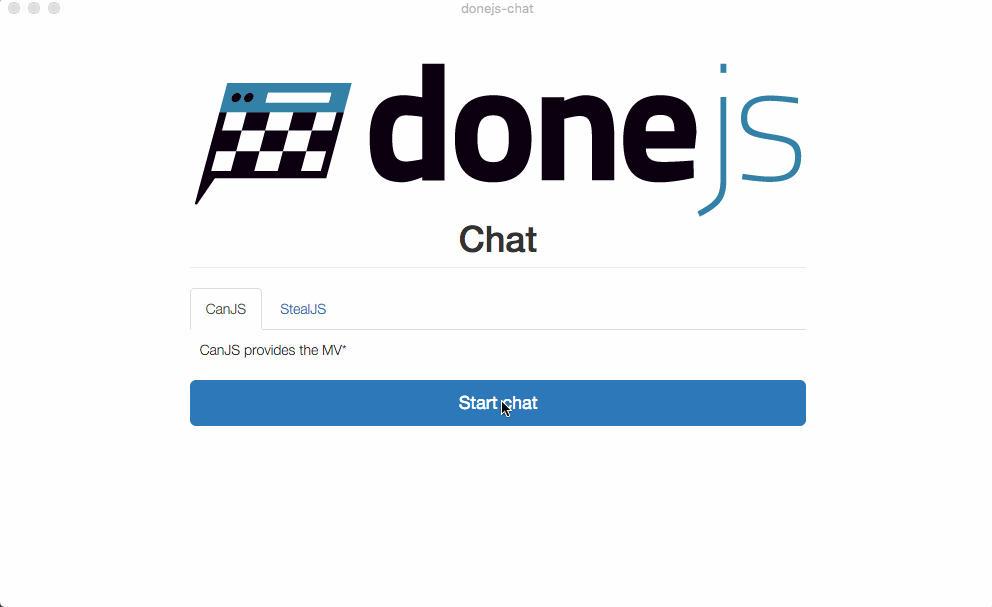
In this guide, we will create chat.donejs.com, a small real-time chat application with a homepage showing a tabs widget and a messages page that lets us send and receive messages in real-time: chat.donejs.com

In the first part of this guide, we will install DoneJS, generate a new application and start a server that provides hot module swapping and server-side rendering. We will then import Bootstrap from npm, create our own custom HTML elements and set up routing between the homepage and the chat messages page. After that, we will complete both pages by adding a tabs widget to the homepage and the ability to send messages and receive real-time updates.

In the final parts of the guide we will make an optimized, progressively loaded production build and deploy it to a CDN. We will conclude with creating a mobile and desktop version of the application.

If you run into any problems, let us know on Slack (in the #donejs channel). We’re happy to help out!

For an even easier version of this guide, one that can be done entirely online, checkout CanJS’s Chat Guide. There, you'll build the same chat widget in a JS Bin, but without a mobile or desktop build and deployment to a CDN.

Similarly, if you are unfamiliar with module loading and module loaders, you may want to checkout StealJS’s Quick Start Guide before proceeding with this guide.

Setup

In this section, we will install DoneJS and generate a new application.

If you haven't already, check out the Setting Up DoneJS guide to ensure you have all of the prerequisites installed and configured.

Install DoneJS

To get started, let’s install the DoneJS command line utility globally:

npm install -g donejs@3

Generate the application

Then we’ll create a new DoneJS application called donejs-chat:

donejs add app donejs-chat --yes

This will create a new folder called donejs-chat and in it generate our application.

The initialization process will ask questions like the name of your application, the source folder, etc. We’ll answer these with the default settings by hitting enter.

donejs add app

This will install all of DoneJS’s dependencies, including the following:

  • StealJS — ES6, CJS, and AMD module loader and builder
  • CanJS — Custom elements and Model-View-ViewModel utilities
  • done-ssr - Server-rendering
  • QUnit — Assertion library (A Mocha generator is also available)
  • FuncUnit — Functional tests
  • Testee — JavaScript Test runner

Turn on development mode

DoneJS comes with its own development server, which hosts your development files and automatically renders the application on the server. Development mode enables hot module swapping, which automatically reloads files in the browser and on the server as they change.

To start it let’s go into the donejs-chat application directory:

cd donejs-chat

We can start development mode by running:

donejs develop

The default port is 8080.

Go to http://localhost:8080/ to see our application showing a default homepage.

hello world

Adding Bootstrap

DoneJS makes it easy to import other projects that are published on npm. In this section, we will install and add Bootstrap to the page, and see DoneJS’s hot module swapping in action.

Install the npm package

Open a new terminal window so we can keep the DoneJS development server running. Then, install the Bootstrap npm package and save it as a dependency of our application like this:

npm install bootstrap@3 --save

Add it to the page

To see hot module swapping in action, let’s update the main template to import Bootstrap’s LESS file and also add some HTML that uses its styles.

Update src/index.stache to look like this:

<html>
  <head>
    <title>{{this.title}}</title>
  </head>
  <body>
    <can-import from="bootstrap/less/bootstrap.less" />
    <can-import from="~/styles.less" />
    <can-import from="~/app" export-as="viewModel" route-data="routeData" />

    <div class="container">
      <div class="row">
        <div class="col-sm-8 col-sm-offset-2">
          <h1 class="page-header text-center">
            <img src="https://donejs.com/static/img/donejs-logo-white.svg"
                alt="DoneJS logo" style="width: 100%;" />
            <br>Chat
          </h1>
        </div>
      </div>
    </div>

    {{#eq(this.env.NODE_ENV, "production")}}
      <script src="{{joinBase('steal.production.js')}}"></script>
    {{else}}
      <script src="/node_modules/steal/steal.js" main></script>
    {{/eq}}
  </body>
</html>

New APIs Used:

If you kept your browser window open at http://localhost:8080/ you should see the updated styles and content as soon as you save the file.

donejs add app

Feel free to edit the HTML or src/styles.less to see how hot module swapping updates the page automatically.

Routing and components

In this part, we will create our own custom HTML elements — one for the homepage and another to display the chat messages. Then we will create routes to navigate between these two pages.

Generate custom elements

We’ll use a DoneJS generator to create custom components. The component generator is run by typing donejs add component <file-or-folder> <component-name>.

The homepage custom element (with the HTML tag name chat-home) won't be very big or complex, so we’ll put everything into a single .component file.

To generate it, run:

donejs add component pages/home.component chat-home

The messages component (with the tag chat-messages) will be a little more complex, so we’ll generate it using the modlet file pattern.

Now run:

donejs add component pages/messages chat-messages

chat.donejs.com

Later we will update the generated files with the chat messages functionality.

Navigate between pages

Routing works a bit differently than other libraries. In other libraries, you might declare routes and map those to controller-like actions. DoneJS application routes map URL strings (like /user/1) to properties on an observable. In other words, our routes will just be a representation of the application state. To learn more about routing visit the CanJS Routing guide.

First, let’s update src/pages/home.component with the original content from the homepage and a link to the chat messages page:

<can-component tag="chat-home">
  <style type="less">
    display: block;

    h1.page-header { margin-top: 0; }
  </style>
  <view>
    <can-import from="can-stache-route-helpers" />
    <h1 class="page-header text-center">
      <img src="https://donejs.com/static/img/donejs-logo-white.svg"
           alt="DoneJS logo" style="width: 100%;" />
      <br>Chat
    </h1>

    <a href="{{routeUrl(page='chat')}}"
       class="btn btn-primary btn-block btn-lg">
      Start chat
    </a>
  </view>
</can-component>

New APIs Used:

  • done-component — a StealJS plugin for CanJS components that allows you to define a component completely within a .component file.
  • routeUrl — a helper that populates the anchor’s href with a URL that sets the page property to "chat" on route.data.

Next, add a link to go back to the homepage from the chat page by updating src/pages/messages/messages.stache to:

<can-import from="can-stache-route-helpers" />
<h5><a href="{{routeUrl(page='home')}}">Home</a></h5>
<p>{{this.message}}</p>

New APIs Used:

  • DefineMap — used to define observable types.
  • route — used to map changes in the URL to changes on the route.data page property.

Switch between pages

Finally we'll glue together these components as separate pages. Our Application ViewModel is where we determine which page to show. This is done by determining the pageComponent, an instance of a can-component, based on the route.data.page property.

Add the following two new properties to src/app.js:

import { DefineMap, route } from 'can';
import RoutePushstate from 'can-route-pushstate';
import debug from 'can-debug#?./is-dev';

//!steal-remove-start
if(debug) {
    debug();
}
//!steal-remove-end

const AppViewModel = DefineMap.extend("AppViewModel", {
  env: {
    default: () => ({NODE_ENV:'development'})
  },
  title: {
    default: 'donejs-chat'
  },
  routeData: {
    default: () => route.data
  },
  pageComponentModuleName: {
    get() {
      switch (this.routeData.page) {
        case 'chat': return '~/pages/messages/';
        default: return '~/pages/home.component';
      }
    }
  },
  pageComponent: {
    get() {
      return steal.import(this.pageComponentModuleName)
      .then(({default: Component}) => {
        return new Component();
      });
    }
  }
});

route.urlData = new RoutePushstate();
route.register("{page}", { page: "home" });

export default AppViewModel;

This imports the chosen page's module and then instantiates a new instance using new Component(). We can use this component by placing it in the index.stache:

<html>
  <head>
    <title>{{this.title}}</title>
  </head>
  <body>
    <can-import from="bootstrap/less/bootstrap.less" />
    <can-import from="~/styles.less" />
    <can-import from="~/app" export-as="viewModel" route-data="routeData" />

    <div class="container">
      <div class="row">
        <div class="col-sm-8 col-sm-offset-2">
          {{#if(this.pageComponent.isResolved)}}
            {{this.pageComponent.value}}
          {{else}}
            Loading...
          {{/if}}
        </div>
      </div>
    </div>

    {{#eq(this.env.NODE_ENV, "production")}}
      <script src="{{joinBase('steal.production.js')}}"></script>
    {{else}}
      <script src="/node_modules/steal/steal.js" main></script>
    {{/eq}}
  </body>
</html>

New APIs Used:

  • steal.import - imports the pageComponentModuleName dynamically.
  • new Component() - creates new instance of the component imported.
  • {{#if(isResolved)}} — Renders the components once their modules have loaded.
  • {{else}} — renders "Loading" while the modules are loading.

Now each component is being dynamically loaded while navigating between the home and messages page. You should see the changes already in your browser.

chat.donejs.com

Homepage

Now that we can navigate between pages, we will finish implementing their functionality, starting with the homepage.

Install bit-tabs

On the homepage, let’s install and add bit-tabs, a simple declarative tabs widget.

Run:

npm install bit-tabs@2 --save

Update the page

Then, import the unstyled custom elements from bit-tabs/unstyled (unstyled because we will use Bootstrap’s styles) and add <bit-tabs> and <bit-panel> elements to the template.

Update src/pages/home.component to:

<can-component tag="chat-home">
  <style type="less">
    display: block;

    bit-panel p {
      padding: 10px;
    }
  </style>
  <view>
    <can-import from="can-stache-route-helpers" />
    <can-import from="bit-tabs/unstyled" />
    <h1 class="page-header text-center">
      <img src="https://donejs.com/static/img/donejs-logo-white.svg"
        alt="DoneJS logo" style="width: 100%;" />
      <br>Chat
    </h1>

    <bit-tabs tabsClass:raw="nav nav-tabs">
      <bit-panel title:raw="CanJS">
        <p>CanJS provides the MV*</p>
      </bit-panel>
      <bit-panel title:raw="StealJS">
        <p>StealJS provides the infrastructure.</p>
      </bit-panel>
    </bit-tabs>

    <a href="{{routeUrl(page='chat')}}"
       class="btn btn-primary btn-block btn-lg">
      Start chat
    </a>
  </view>
</can-component>

You'll notice tabs appear in the browser:

chat.donejs.com

Messages page

In this section we add live chat functionality to the messages page. We’ll need to:

  • Create a messages model that connects to a RESTful API.
  • Add the ability to retrieve and list messages and create new messages.
  • Make the message list receive real-time updates from other clients.

Generate Message model

To load messages from the server, we will use can-connect’s supermodel.

Generate a message supermodel like this:

donejs add supermodel message

When asked for the URL endpoint, set it to our remote RESTful API at https://chat.donejs.com/api/messages. When it asks if https://chat.donejs.com is your service URL answer Yes. The other questions can be answered with the default by hitting enter.

model generator

Update src/models/message.js to:

import { DefineMap, DefineList, superModel } from 'can';
import loader from '@loader';

const Message = DefineMap.extend('Message', {
  seal: false
}, {
  'id': {
    type: 'any',
    identity: true
  },
  name: 'string',
  body: 'string'
});

Message.List = DefineList.extend('MessageList', {
  '#': Message
});

Message.connection = superModel({
  url: loader.serviceBaseURL + '/api/messages',
  Map: Message,
  List: Message.List,
  name: 'message'
});

export default Message;

New APIs Used:

  • QueryLogic — used to describe a service-layer’s parameters. For example if "api/messages?limit=20" only returned 20 messages, you would configure the limit parameter behavior in the connection’s queryLogic.
  • DefineList — used to define the behavior of an observable list of Messages.
  • superModel — connects the Message type to the
    restful '/api/messages' service. This adds real-time, fall-through-caching and other useful behaviors.
  • loader — references the module loader that is loading this code. All configuration in your package.json’s "steal" property is available, including the serviceBaseUrl.

Use the connection

The generated file is all that is needed to connect to our RESTful API. Use it by importing it and requesting a list of all messages.

Update src/pages/messages/messages.js to:

import { Component } from 'can';
import './messages.less';
import view from './messages.stache';
import Message from '../../models/message';

export default Component.extend({
  tag: 'chat-messages',
  view,
  ViewModel: {
    // EXTERNAL STATEFUL PROPERTIES
    // These properties are passed from another component. Example:
    // value: {type: "number"}

    // INTERNAL STATEFUL PROPERTIES
    // These properties are owned by this component.
    message: { default: "This is the chat-messages component" },

    // DERIVED PROPERTIES
    // These properties combine other property values. Example:
    // get valueAndMessage(){ return this.value + this.message; }
    get messagesPromise() {
      return Message.getList({});
    },

    // METHODS
    // Functions that can be called by the view. Example:
    // incrementValue() { this.value++; }

    // SIDE EFFECTS
    // The following is a good place to perform changes to the DOM
    // or do things that don't fit in to one of the areas above.
    connectedCallback(element){

    }
  }
});

New APIs Used:

  • getList — returns a promise that resolves to a Message.List of Message instances.

Display the messages by updating src/pages/messages/messages.stache to:

<can-import from="can-stache-route-helpers" />
<h5><a href="{{routeUrl(page='home')}}">Home</a></h5>

{{#if(this.messagesPromise.isResolved)}}
  {{#for(message of this.messagesPromise.value)}}
    <div class="list-group-item">
      <h4 class="list-group-item-heading">{{message.name}}</h4>
      <p class="list-group-item-text">{{message.body}}</p>
    </div>
  {{else}}
    <div class="list-group-item">
      <h4 class="list-group-item-heading">No messages</h4>
    </div>
  {{/for}}
{{/if}}

New APIs Used:

  • {{#each}} — loops through each Message instance.
  • {{key}} — reads either the name or body of a Message instance and inserts it into the output of the template.

If you open localhost:8080/chat, you will see a list of messages from the server or the "No message" text.

chat.donejs.com

Create messages

Now let’s add the form to create new messages. The form will two-way bind the name and body properties to the component’s view-model and calls send() when hitting the enter key in the message input.

First we have to implement the send() method. Update src/pages/messages/messages.js to this:

import { Component } from 'can';
import './messages.less';
import view from './messages.stache';
import Message from '../../models/message';

export default Component.extend({
  tag: 'chat-messages',
  view,
  ViewModel: {
    // EXTERNAL STATEFUL PROPERTIES
    // These properties are passed from another component. Example:
    // value: {type: "number"}

    // INTERNAL STATEFUL PROPERTIES
    // These properties are owned by this component.
    name: 'string',
    body: 'string',

    // DERIVED PROPERTIES
    // These properties combine other property values. Example:
    // get valueAndMessage(){ return this.value + this.message; }
    get messagesPromise() {
      return Message.getList({});
    },

    // METHODS
    // Functions that can be called by the view. Example:
    // incrementValue() { this.value++; }
    send(event) {
      event.preventDefault();

      new Message({
        name: this.name,
        body: this.body
      }).save().then(msg => this.body = '');
    },

    // SIDE EFFECTS
    // The following is a good place to perform changes to the DOM
    // or do things that don't fit in to one of the areas above.
    connectedCallback(element){

    }
  }
});

New APIs Used:

  • save() — creates a POST request to /api/messages with the message data.

The send() method takes the name and message properties from the view-model and creates a Message instance, saving it to the server. Once saved successfully, it sets the message to an empty string to reset the input field.

Next update src/pages/messages/messages.stache to look like this:

<can-import from="can-stache-route-helpers" />
<h5><a href="{{routeUrl(page='home')}}">Home</a></h5>

{{#if(this.messagesPromise.isResolved)}}
  {{#for(message of this.messagesPromise.value)}}
    <div class="list-group-item">
      <h4 class="list-group-item-heading">{{message.name}}</h4>
      <p class="list-group-item-text">{{message.body}}</p>
    </div>
  {{else}}
    <div class="list-group-item">
      <h4 class="list-group-item-heading">No messages</h4>
    </div>
  {{/for}}
{{/if}}

<form class="row" on:submit="this.send(scope.event)">
  <div class="col-sm-3">
    <input type="text" class="form-control" placeholder="Your name"
           value:bind="this.name" />
  </div>
  <div class="col-sm-6">
    <input type="text" class="form-control" placeholder="Your message"
           value:bind="this.body" />
  </div>
  <div class="col-sm-3">
    <input type="submit" class="btn btn-primary btn-block" value="Send" />
  </div>
</form>

New APIs Used:

  • on:submit — listens to submit events and calls the send() method on the ViewModel.
  • value:bind — two-way bindings a <input>’s value to a property of the ViewModel.

You can now enter your name and a message! It will automatically appear in our messages list.

chat.donejs.com

In fact, all lists that are related to that model will be updated automatically whenever there is new, modified, or deleted data. can-connect automatically manages the lists, while also providing caching and minimized data requests.

You can see from your console that the localStorage cache is already populated with data:

chat.donejs.com

Enable a real-time connection

Right now our chat’s messages update automatically with our own messages, but not with messages from other clients. The API server (chat.donejs.com/api/messages) provides a Socket.io server that sends out real-time updates for new, updated and deleted chat messages.

To connect to it, first we’ll install a socket.io connector, by running:

npm install steal-socket.io --save

Update src/models/message.js to:

import { DefineMap, DefineList, superModel } from 'can';
import loader from '@loader';
import io from 'steal-socket.io';

const Message = DefineMap.extend('Message', {
  seal: false
}, {
  'id': {
    type: 'any',
    identity: true
  },
  name: 'string',
  body: 'string'
});

Message.List = DefineList.extend('MessageList', {
  '#': Message
});

Message.connection = superModel({
  url: loader.serviceBaseURL + '/api/messages',
  Map: Message,
  List: Message.List,
  name: 'message'
});

const socket = io(loader.serviceBaseURL);

socket.on('messages created',
  message => Message.connection.createInstance(message));
socket.on('messages updated',
  message => Message.connection.updateInstance(message));
socket.on('messages removed',
  message => Message.connection.destroyInstance(message));

export default Message;

New APIs used:

  • createInstance — tells the real-time system that a message has been created.
  • updateInstance — tells the real-time system that a message has been updated.
  • destroyInstance — tells the real-time system that a message has been destroyed.

This will listen to messages <event> events sent by the server and tell the connection to update all active lists of messages accordingly. Try opening another browser window to see receiving messages in real-time.

two browsers

Production build

Now that we implemented the complete chat functionality we can get our application ready for production.

Run build

We can find the build configuration in build.js in the application folder.

Everything is already set up, so we can simply make a build by running:

donejs build

The optimized bundles that load your JavaScript and CSS as fast as possible are sent to the dist/ folder.

Turn on production

To test the production build, close the current server (with CTRL + C) and start it with the environment (NODE_ENV) set to production:

NODE_ENV=production donejs start

If you’re using Windows, you must first set the environmental variable:

  1. For Windows command prompt you set with set NODE_ENV=production
  2. For Windows Powershell you set it with $env:NODE_ENV="production"

Then run your application with donejs start.

If we now open localhost:8080 again we can see the production bundles being loaded in the network tab of the developer tools.

two browsers

All DoneJS projects are extremely modular, which is why in development mode, you see 200 or more requests when loading the page (thanks to hot-module swapping, we only have to make those requests once). In production mode, we can see only about 8 requests and a significantly reduced file-size.

Deploy

Now that we verified that our application works in production, we can deploy it to the web. In this section, we will use Firebase, a service that provides static file hosting and Content Delivery Network (CDN) support, to automatically deploy and serve our application’s static assets from a CDN.

Set up Firebase

Sign up for free at Firebase. After you have an account go to Firebase console and create an app called donejs-chat-<user> where <user> is your GitHub username. Write down the name of your app because you'll need it in the next section.

You'll get an error if your app name is too long, so pick something on the shorter side. After you're created your app be sure to note the Firebase ID, as this is the information you need to enter in the next section.

When you deploy for the first time it will ask you to authorize, but first we need to configure the project.

Configure DoneJS

Now we can add the Firebase deployment configuration to our package.json like this:

donejs add firebase

When prompted, enter the name of the application created when you set up the Firebase app. Before you can deploy your app you need to login and authorize the Firebase tools, which you can do with:

node_modules/.bin/firebase login

Then we can deploy the application by running:

donejs build
donejs deploy

Static files are deployed to Firebase.

two browsers

And verify that the application is loading from the CDN by loading it after running:

NODE_ENV=production donejs start

If you’re using Windows, set the NODE_ENV variable as you did previously in the Production section.

We should now see our assets being loaded from the Firebase CDN.

two browsers

Desktop and mobile apps

In the last part of this guide we will make mobile and desktop builds of our chat application, using Cordova and Electron.

Cordova

To build the application as a Cordova based mobile application, you need to have each platform’s SDK installed. We’ll be building an iOS app if you are a Mac user, and an Android app if you’re a Windows user.

Mac users should download XCode from the AppStore and install the ios-sim package globally with:

npm install -g ios-sim

We will use these tools to create an iOS application that can be tested in the iOS simulator.

Windows users should install the Android Studio, which gives all of the tools we need.

Now we can install the DoneJS Cordova tools with:

donejs add cordova@2

Depending on your operating system you can accept most of the defaults, unless you would like to build for Android, which needs to be selected from the list of platforms.

To run the Cordova build and launch the simulator we can now run:

donejs build cordova

If everything went well, we should see the emulator running our application.

ios build

Windows users will get instructions to download the latest version of the platform and to create a Virtual Device. Follow the instructions and then re-do the build. This will only happen the first time you build for Cordova.

Note: if you receive the error Error: Cannot read property 'replace' of undefined, you can work around it by running cd build/cordova/platforms/ios/cordova/ && npm install ios-sim@6 until this patch is released.

Electron

To set up the desktop build, we have to add it to our application like this:

donejs add electron@2

Accept the default for all of the prompts.

electron prompt

Then we can run the build like this:

donejs build electron

The macOS application can be opened with

open build/donejs-chat-darwin-x64/donejs-chat.app

The Windows application can be opened with

.\build\donejs-chat-win32-x64\donejs-chat.exe

electron app

What’s next?

In this guide we created a small chat application that connects to a remote API with DoneJS. It has routing between two pages and can send and receive messages in real-time. We built an optimized bundle for production and deployed it to a static file host and CDN. Last, we made builds of the application as a mobile and desktop application.

If you want to learn more about DoneJS - like how to create more complex custom elements and routes, write and automatically run tests, Continuous Integration and Continuous Deployment - head over to the place-my-order Guide.

If you’re not ready for that yet, we might suggest the following guides:

  • CanJS’s TodoMVC Guide and ATM Guide — to better familiarize yourself with CanJS (DoneJS’s models, views, and observables).
  • StealJS’s Progressive Loading Guide — to better familiarize yourself with StealJS (DoneJS’s module loader and builder).
Help us improve DoneJS by taking our community survey