In-depth guide

  • page
place-my-order  

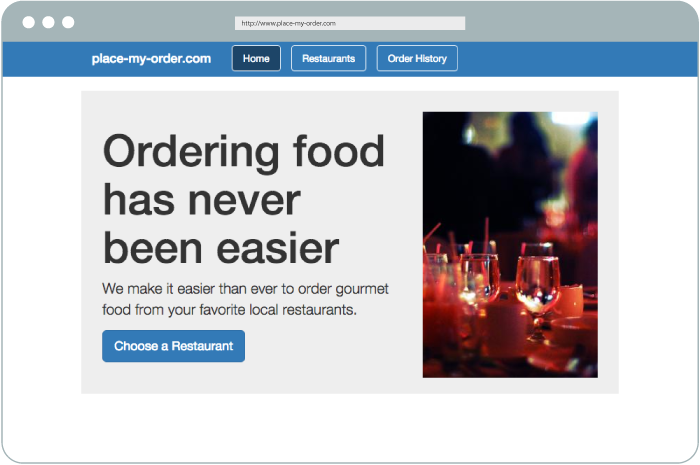
In this guide you will learn about all of DoneJS' features by creating, testing, documenting, building and deploying place-my-order.com, a restaurant menu and ordering application. The final result will look like this:

After the initial application setup, which includes a server that hosts and pre-renders the application, we will create several custom elements and bring them together using the application state and routes. Then we will learn how to retrieve data from the server using a RESTful API.

After that we will talk about what a view model is and how to identify, implement and test its functionality. Once we have unit tests running in the browser, we will automate running them locally from the command line and also on a continuous integration server. In the subsequent chapters, we will show how to easily import other modules into our application and how to set up a real-time connection.

Finally, we will describe how to build and deploy our application to the web, as a desktop application with Electron, and as a mobile app with Cordova.

Set up the project

In this section we will create our DoneJS project and set up a RESTful API for the application to use. You will need NodeJS installed and your code editor of choice.

If you haven't already, check out the Setting Up DoneJS guide to ensure you have all of the prerequisites installed and configured.

Create the project

To get started, let's install the DoneJS command line utility globally:

npm install -g donejs@3

Then we can create a new DoneJS application:

donejs add app place-my-order --yes

The initialization process will ask you questions like the name of your application (set to place-my-order) and the source folder (set to src). The other questions can be skipped by hitting enter. This will install all of DoneJS' dependencies. The main project dependencies include:

  • StealJS - ES6, CJS, and AMD module loader and builder
  • CanJS - Custom elements and Model-View-ViewModel utilities
  • done-ssr - Server-rendering
  • QUnit or Mocha - Assertion library
  • FuncUnit - Functional tests
  • Testee - Test runner

If we now go into the place-my-order folder with

cd place-my-order

We can see the following files:

├── build.js
├── development.html
├── package.json
├── production.html
├── README.md
├── test.html
├── src/
|   ├── app.js
|   ├── index.stache
|   ├── is-dev.js
|   ├── models/
|   |   ├── fixtures
|   |   |   ├── fixtures.js
|   |   ├── test.js
|   ├── styles.less
|   ├── test.js
├── node_modules/

Let's have a quick look at the purpose of each:

  • development.html, production.html those pages can run the DoneJS application in development or production mode without a server.
  • package.json is the main configuration file that defines all our application dependencies and other settings.
  • test.html is used to run all our tests.
  • README.md is the readme file for your repository.
  • src is the folder where all our development assets live in their own modlets (more about that later).
  • src/app.js is the main application file, which exports the main application state.
  • src/index.stache is the main client template that includes server-side rendering.
  • src/is-dev.js is used to conditional load modules in development-mode only.
  • src/models/ is the folder where models for the API connection will be put. It currently contains fixtures/fixtures.js which will reference all the specific models fixtures files (so that we can run model tests without the need for a running API server) and test.js which will later gather all the individual model test files.
  • src/styles.less is the main application styles.
  • src/test.js collects all individual component and model tests we will create throughout this guide as well as the functional smoke test for our application and is loaded by test.html.

Development mode

DoneJS comes with its own server, which hosts your development files and takes care of server-side rendering. DoneJS' development mode will also enable hot module swapping which automatically reloads files in the browser as they change. You can start it by running:

donejs develop

The default port is 8080, so if we now go to http://localhost:8080/ we can see our application with a default homepage. If we change src/index.stache or src/app.js all changes will show up right away in the browser. Try it by adding some HTML in src/index.stache.

Setup a service API

Single page applications often communicate with a RESTful API and a WebSocket connection for real-time updates. This guide will not cover how to create a REST API. Instead, we'll just install and start an existing service API created specifically for use with this tutorial:

Note: Kill the server for now while we install a few dependencies (ctrl+c on Windows and Mac).

npm install place-my-order-api@1 --save

Now we can add an API server start script into the scripts section of our package.json like this:

  "scripts": {
    "api": "place-my-order-api --port 7070",
    "test": "testee test.html --browsers firefox --reporter Spec",
    "start": "done-serve --port 8080",
    "develop": "done-serve --develop --port 8080",
    "build": "node build"
  },

Which allows us to start the server like:

donejs api

The first time it starts, the server will initialize some default data (restaurants and orders). Once started, you can verify that the data has been created and the service is running by going to http://localhost:7070/restaurants, where we can see a JSON list of restaurant data.

Starting the application

Now our application is good to go and we can start the server. We need to proxy the place-my-order-api server to /api on our server in order to avoid violating the same origin policy. This means that we need to modify the start and develop script in our package.json to:

"scripts": {
  "api": "place-my-order-api --port 7070",
  "test": "testee test.html --browsers firefox --reporter Spec",
  "start": "done-serve --proxy http://localhost:7070 --port 8080",
  "develop": "done-serve --develop --proxy http://localhost:7070 --port 8080",
  "build": "node build"
},

Now we can start the application with:

donejs develop

Go to http://localhost:8080 to see the "hello world" message again.

Loading assets

Before we get to the code, we also need to install the place-my-order-assets package which contains the images and styles specifically for this tutorial's application:

npm install place-my-order-assets@0.1 --save

Every DoneJS application consists of at least two files:

  1. A main template (in this case src/index.stache) which contains the main template and links to the development or production assets.
  2. A main application view-model (src/app.js) that initializes the application state and routes.

src/index.stache was already created for us when we ran donejs add app, so update it to load the static assets and set a <meta> tag to support a responsive design:

<html>
  <head>
    <title>{{this.title}}</title>
    <meta name="viewport" content="minimal-ui, width=device-width, initial-scale=1, maximum-scale=1, user-scalable=no">
  </head>
  <body>
    <can-import from="place-my-order-assets" />
    <can-import from="~/styles.less" />
    <can-import from="~/app" export-as="viewModel" route-data="routeData" />

    <h1>The <strong>{{this.routeData.page}}</strong> page</h1>

    {{#eq(this.env.NODE_ENV, "production")}}
      <script src="{{joinBase('steal.production.js')}}"></script>
    {{else}}
      <script src="/node_modules/steal/steal.js" main></script>
    {{/eq}}
  </body>
</html>

This is an HTML5 template that uses can-stache - a Handlebars syntax-compatible view engine. It renders a message property from the application state.

can-import loads the template's dependencies:

  1. The place-my-order-assets package, which loads the LESS styles for the application
  2. place-my-order/app, which is the main application file

The main application file at src/app.js looks like this:

// src/app.js
import { DefineMap, route } from 'can';
import RoutePushstate from 'can-route-pushstate';
import debug from 'can-debug#?./is-dev';

//!steal-remove-start
if(debug) {
    debug();
}
//!steal-remove-end

const AppViewModel = DefineMap.extend("AppViewModel", {
  env: {
    default: () => ({NODE_ENV:'development'})
  },
  title: {
    default: 'place-my-order'
  },
  routeData: {
    default: () => route.data
  }
});

route.urlData = new RoutePushstate();
route.register("{page}", { page: "home" });

export default AppViewModel;

This initializes a DefineMap: a special object that acts as the application global state (with a default message property) and also plays a key role in enabling server side rendering.

Creating custom elements

One of the most important concepts in DoneJS is splitting up your application functionality into individual, self-contained modules. In the following section we will create separate components for the homepage, the restaurant list, and the order history page. After that, we will glue them all together using routes and the global application state.

There are two ways of creating components. For smaller components we can define all templates, styles and functionality in a single .component file (to learn more see done-component). Larger components can be split up into several separate files.

Creating a homepage element

To generate a new component run:

donejs add component pages/home.component pmo-home

This will create a file at src/pages/home.component containing the basic ingredients of a component. We will update it to reflect the below content:

<can-component tag="pmo-home">
  <style type="less">
    display: block;

    p { font-weight: bold; }
  </style>
  <view>
    <can-import from="can-stache-route-helpers" />
    <div class="homepage">
      <img src="{{joinBase('node_modules/place-my-order-assets/images/homepage-hero.jpg')}}"
          alt="Restaurant table with glasses." width="250" height="380" />
      <h1>Ordering food has never been easier</h1>
      <p>
        We make it easier than ever to order gourmet food
        from your favorite local restaurants.
      </p>
      <p>
        <a class="btn" href="{{routeUrl(page='restaurants')}}" role="button">Choose a Restaurant</a>
      </p>
    </div>
  </view>
  <script type="view-model">
    import { DefineMap } from 'can';

    export default DefineMap.extend("PmoHomeVM", {
      // EXTERNAL STATEFUL PROPERTIES
      // These properties are passed from another component. Example:
      // value: {type: "number"}

      // INTERNAL STATEFUL PROPERTIES
      // These properties are owned by this component.
      message: { default: "This is the pmo-home component" },

      // DERIVED PROPERTIES
      // These properties combine other property values. Example:
      // get valueAndMessage(){ return this.value + this.message; }

      // METHODS
      // Functions that can be called by the view. Example:
      // incrementValue() { this.value++; }

      // SIDE EFFECTS
      // The following is a good place to perform changes to the DOM
      // or do things that don't fit in to one of the areas above.
      connectedCallback(element){

      }
    });
  </script>
</can-component>

Here we created a can-component named pmo-home. This particular component is just a basic template, it does not have much in the way of styles or functionality.

Create the order history element

We'll create an initial version of order history that is very similar.

donejs add component pages/order/history.component pmo-order-history

And update src/pages/order/history.component:

<can-component tag="pmo-order-history">
  <style type="less">
    display: block;

    p { font-weight: bold; }
  </style>
  <view>
    <div class="order-history">
      <div class="order header">
        <address>Name / Address / Phone</address>
        <div class="items">Order</div>
        <div class="total">Total</div>
        <div class="actions">Action</div>
      </div>
    </div>
  </view>
  <script type="view-model">
    import { DefineMap } from 'can';

    export default DefineMap.extend("PmoOrderHistoryVM", {
      // EXTERNAL STATEFUL PROPERTIES
      // These properties are passed from another component. Example:
      // value: {type: "number"}

      // INTERNAL STATEFUL PROPERTIES
      // These properties are owned by this component.
      message: { default: "This is the pmo-order-history component" },

      // DERIVED PROPERTIES
      // These properties combine other property values. Example:
      // get valueAndMessage(){ return this.value + this.message; }

      // METHODS
      // Functions that can be called by the view. Example:
      // incrementValue() { this.value++; }

      // SIDE EFFECTS
      // The following is a good place to perform changes to the DOM
      // or do things that don't fit in to one of the areas above.
      connectedCallback(element){

      }
    });
  </script>
</can-component>

Creating a restaurant list element

The restaurant list will contain more functionality, which is why we will split its template and component logic into separate files.

We can create a basic component like that by running:

donejs add component pages/restaurant/list pmo-restaurant-list

The component's files are collected in a single folder so that components can be easily tested, moved, and re-used. The folder structure looks like this:

├── node_modules
├── package.json
├── src/
|   ├── app.js
|   ├── index.md
|   ├── index.stache
|   ├── test.js
|   ├── models
|   ├── pages/
|   |   ├── order/
|   |   |   ├── history.component
|   |   ├── restaurant/
|   |   |   ├── list/
|   |   |   |   ├── list.html
|   |   |   |   ├── list.js
|   |   |   |   ├── list.less
|   |   |   |   ├── list.md
|   |   |   |   ├── list.stache
|   |   |   |   ├── list-test.js
|   |   |   |   ├── test.html

We will learn more about those files and add more functionality to this element later, but it already contains a fully functional component with a demo page (see localhost:8080/src/pages/restaurant/list/list.html), a basic test (at localhost:8080/src/pages/restaurant/list/test.html) and documentation placeholders.

Setting up routing

In this part, we will create routes - URL patterns that load specific parts of our single page app. We'll also dynamically load the custom elements we created and integrate them in the application's main page.

Create Routes

Routing works a bit differently than other libraries. In other libraries, you might declare routes and map those to controller-like actions.

DoneJS application routes map URL strings (like /user/1) to properties in our application state. In other words, our routes will just be a representation of the application state.

To learn more about routing visit the CanJS routing guide.

To add our routes, change src/app.js to:

import { DefineMap, route } from 'can';
import RoutePushstate from 'can-route-pushstate';
import debug from 'can-debug#?./is-dev';

//!steal-remove-start
if(debug) {
    debug();
}
//!steal-remove-end

const AppViewModel = DefineMap.extend("AppViewModel", {
  page: 'string',
  slug: 'string',
  action: 'string',
  env: {
    default: () => ({NODE_ENV:'development'})
  },
  title: {
    default: 'place-my-order'
  },
  routeData: {
    default: () => route.data
  }
});

route.urlData = new RoutePushstate();
route.register("{page}", { page: "home" });
route.register('{page}/{slug}', { slug: null });
route.register('{page}/{slug}/{action}', { slug: null, action: null });

export default AppViewModel;

Now we have three routes available:

Adding a header element

Now is also a good time to add a header element that links to the different routes we just defined. We can run

donejs add component components/header.component pmo-header

and update src/components/header.component to:

<can-component tag="pmo-header">
  <style type="less">
    display: block;

    p { font-weight: bold; }
  </style>
  <view>
    <can-import from="can-stache-route-helpers" />
    <header>
      <nav>
       <h1>place-my-order.com</h1>
       <ul>
         <li class="{{#eq(this.page, 'home')}}active{{/eq}}">
           <a href="{{routeUrl(page='home')}}">Home</a>
         </li>
         <li class="{{#eq(this.page, 'restaurants')}}active{{/eq}}">
           <a href="{{routeUrl(page='restaurants')}}">Restaurants</a>
         </li>
         <li class="{{#eq(this.page, 'order-history')}}active{{/eq}}">
           <a href="{{routeUrl(page='order-history')}}">Order History</a>
         </li>
       </ul>
      </nav>
    </header>
  </view>
  <script type="view-model">
    import { DefineMap } from 'can';

    export default DefineMap.extend("PmoHeaderVM", {
      // EXTERNAL STATEFUL PROPERTIES
      // These properties are passed from another component. Example:
      // value: {type: "number"}
      page: "string",

      // INTERNAL STATEFUL PROPERTIES
      // These properties are owned by this component.
      message: { default: "This is the pmo-header component" },

      // DERIVED PROPERTIES
      // These properties combine other property values. Example:
      // get valueAndMessage(){ return this.value + this.message; }

      // METHODS
      // Functions that can be called by the view. Example:
      // incrementValue() { this.value++; }

      // SIDE EFFECTS
      // The following is a good place to perform changes to the DOM
      // or do things that don't fit in to one of the areas above.
      connectedCallback(element){

      }
    });
  </script>
</can-component>

Here we use routeUrl to create links that will set values in the application state. For example, the first usage of routeUrl above will create a link based on the current routing rules (http://localhost:8080/home in this case) that sets the page property to home when clicked.

We also use the Stache eq helper to make the appropriate link active.

Switch between components

Now we can glue all those individual components together. What we want to do is - based on the current page (home, restaurants or order-history) - load the correct component and then initialize it.

Update src/app.js to:

import { DefineMap, route } from 'can';
import RoutePushstate from 'can-route-pushstate';
import debug from 'can-debug#?./is-dev';

//!steal-remove-start
if(debug) {
    debug();
}
//!steal-remove-end

const AppViewModel = DefineMap.extend("AppViewModel", {
    page: 'string',
    slug: 'string',
    action: 'string',
  env: {
    default: () => ({NODE_ENV:'development'})
  },
  title: {
    default: 'place-my-order'
  },
  routeData: {
    default: () => route.data
  },
  get pageComponent() {
    switch(this.routeData.page) {
      case 'home': {
        return steal.import('~/pages/home.component').then(({default: Home}) => {
          return new Home();
        });
      }

      case 'restaurants': {
        return steal.import('~/pages/restaurant/list/').then(({default: RestaurantList}) => {
          return new RestaurantList();
        });
      }

      case 'order-history': {
        return steal.import('~/pages/order/history.component').then(({default: OrderHistory}) => {
          return new OrderHistory();
        });
      }
    }
  }
});

route.urlData = new RoutePushstate();
route.register("{page}", { page: "home" });
route.register('{page}/{slug}', { slug: null });
route.register('{page}/{slug}/{action}', { slug: null, action: null });

export default AppViewModel;

Update src/index.stache to:

<html>
  <head>
    <title>{{this.title}}</title>
    <meta name="viewport" content="minimal-ui, width=device-width, initial-scale=1, maximum-scale=1, user-scalable=no">
  </head>
  <body>
    <can-import from="place-my-order-assets" />
    <can-import from="~/styles.less" />
    <can-import from="~/app" export-as="viewModel" route-data="routeData" />

    <can-import from="~/components/header.component" />
    <pmo-header page:from="this.routeData.page"/>

    {{#if(this.pageComponent.isResolved)}}
      {{this.pageComponent.value}}
    {{else}}
      <div class="loading"></div>
    {{/if}}

    {{#eq(this.env.NODE_ENV, "production")}}
      <script src="{{joinBase('steal.production.js')}}"></script>
    {{else}}
      <script src="/node_modules/steal/steal.js" main></script>
    {{/eq}}
  </body>
</html>

Here we use a switch statement that checks for the current page property on the route.data, then progressively loads the component with steal.import and initializes it.

In the template {{#if(this.pageComponent.isResolved)}} shows a loading indicator while the page loads, and then inserts the page (the one instantiated in the Application ViewModel) with {{this.pageComponent.value}}.

Now we can see the header and the home component and be able to navigate to the different pages through the header.

Getting Data from the Server

In this next part, we'll connect to the RESTful API that we set up with place-my-order-api, using the powerful data layer provided by CanJS with QueryLogic and realtimeRestModel.

Creating a restaurants connection

At the beginning of this guide we set up a REST API at http://localhost:7070 and told done-serve to proxy it to http://localhost:8080/api.

To manage the restaurant data located at http://localhost:8080/api/restaurants, we'll create a restaurant supermodel:

donejs add supermodel restaurant

Answer the question about the URL endpoint with /api/restaurants and the name of the id property with _id.

We have now created a model and fixtures (for testing without an API) with a folder structure like this:

├── node_modules
├── package.json
├── src/
|   ├── app.js
|   ├── index.md
|   ├── index.stache
|   ├── test.js
|   ├── models/
|   |   ├── fixtures/
|   |   |   ├── restaurants.js
|   |   ├── fixtures.js
|   |   ├── restaurant.js
|   |   ├── restaurant-test.js
|   |   ├── test.js

Test the connection

To test the connection you can run the following in the browser console. You can access the browser console by right clicking in the browser and selecting Inspect. Then switch to the Console tab if not already there. Test the connection with:

steal.import("place-my-order/models/restaurant")
  .then(function(module) {
    let Restaurant = module["default"];
    return Restaurant.getList({});
  }).then(function(restaurants) {
    console.log(restaurants);
  });

This programmatically imports the Restaurant model and uses it to get a list of all restaurants on the server and log them to the console.

Add data to the page

Now, update the ViewModel in src/pages/restaurant/list/list.js to load all restaurants from the restaurant connection:

import { Component } from 'can';
import './list.less';
import view from './list.stache';
import Restaurant from '~/models/restaurant';

const RestaurantList = Component.extend({
  tag: 'pmo-restaurant-list',
  view,
  ViewModel: {
    // EXTERNAL STATEFUL PROPERTIES
    // These properties are passed from another component. Example:
    // value: {type: "number"}

    // INTERNAL STATEFUL PROPERTIES
    // These properties are owned by this component.
    restaurants: {
      default() {
        return Restaurant.getList({});
      }
    },

    // DERIVED PROPERTIES
    // These properties combine other property values. Example:
    // get valueAndMessage(){ return this.value + this.message; }

    // METHODS
    // Functions that can be called by the view. Example:
    // incrementValue() { this.value++; }

    // SIDE EFFECTS
    // The following is a good place to perform changes to the DOM
    // or do things that don't fit in to one of the areas above.
    connectedCallback(element){

    }
  }
});

export default RestaurantList;
export const ViewModel = RestaurantList.ViewModel;

Note: we also removed the message property.

And update the template at src/pages/restaurant/list/list.stache to use the Promise returned for the restaurants property to render the template:

<can-import from="can-stache-route-helpers" />

<div class="restaurants">
  <h2 class="page-header">Restaurants</h2>
  {{#if(this.restaurants.isPending)}}
    <div class="restaurant loading"></div>
  {{/if}}

  {{#if(this.restaurants.isResolved)}}
    {{#for(restaurant of this.restaurants.value)}}
      {{let addr=restaurant.address}}

      <div class="restaurant">
        <img src="{{joinBase(restaurant.images.thumbnail)}}"
          width="100" height="100">
        <h3>{{restaurant.name}}</h3>
        
        {{#if(addr)}}
        <div class="address">
          {{addr.street}}<br />{{addr.city}}, {{addr.state}} {{addr.zip}}
        </div>
        {{/if}}

        <div class="hours-price">
          $$$<br />
          Hours: M-F 10am-11pm
          <span class="open-now">Open Now</span>
        </div>

        <a class="btn" href="{{routeUrl(page='restaurants' slug=restaurant.slug)}}">
          Details
        </a>
        <br />
      </div>
    {{/for}}
  {{/if}}
</div>

By checking for restaurants.isPending and restaurants.isResolved we are able to show a loading indicator while the data are being retrieved. Once resolved, the actual restaurant list is available at restaurants.value. When navigating to the restaurants page now we can see a list of all restaurants.

Note the usage of routeUrl to set up a link that points to each restaurant. slug=slug is not wrapped in quotes because the helper will populate each restaurant's individual slug property in the URL created.

Creating a unit-tested view model

In this section we will create a view model for the restaurant list functionality.

We'll show a dropdown of all available US states. When the user selects a state, we'll show a list of cities. Once a city is selected, we'll load a list of all restaurants for that city. The end result will look like this:

Restaurant list

Identify view model state

First we need to identify the properties that our view model needs to provide. We want to load a list of states from the server and let the user select a single state. Then we do the same for cities and finally load the restaurant list for that selection.

All asynchronous requests return a Promise, so the data structure will look like this:

{
 states: Promise<[State]>
 state: String "IL",
 cities: Promise<[City]>,
 city: String "Chicago",
 restaurants: Promise<[Restaurant]>
}

Create dependent models

The API already provides a list of available states and cities. To load them we can create the corresponding models like we already did for Restaurants.

Run:

donejs add supermodel state

When prompted, set the URL to /api/states and the id property to short.

Run:

donejs add supermodel city

When prompted, set the URL to /api/cities and the id property to name.

Now we can load a list of states and cities.

Implement view model behavior

Now that we have identified the view model properties needed and have created the models necessary to load them, we can define the states, state, cities and city properties in the view model at src/pages/restaurant/list/list.js:

import { Component } from 'can';
import './list.less';
import view from './list.stache';
import Restaurant from '~/models/restaurant';
import State from '~/models/state';
import City from '~/models/city';

const RestaurantList = Component.extend({
  tag: 'pmo-restaurant-list',
  view,
  ViewModel: {
    // EXTERNAL STATEFUL PROPERTIES
    // These properties are passed from another component. Example:
    // value: {type: "number"}

    // INTERNAL STATEFUL PROPERTIES
    // These properties are owned by this component.
    get states() {
      return State.getList();
    },
    state: {
      type: 'string',
      default: null
    },
    get cities() {
      let state = this.state;

      if(!state) {
        return null;
      }

      return City.getList({ filter: { state } });
    },
    city: {
      type: 'string',
      value({lastSet, listenTo, resolve}) {
        listenTo(lastSet, resolve);
        listenTo('state', () => resolve(null));
        resolve(null)
      }
    },
    get restaurants() {
      let state = this.state;
      let city = this.city;

      if(state && city) {
        return Restaurant.getList({
          filter: {
            'address.state': state,
            'address.city': city
          }
        });
      }

      return null;
    },

    // DERIVED PROPERTIES
    // These properties combine other property values. Example:
    // get valueAndMessage(){ return this.value + this.message; }

    // METHODS
    // Functions that can be called by the view. Example:
    // incrementValue() { this.value++; }

    // SIDE EFFECTS
    // The following is a good place to perform changes to the DOM
    // or do things that don't fit in to one of the areas above.
    connectedCallback(element){

    }
  }
});

export default RestaurantList;
export const ViewModel = RestaurantList.ViewModel;

Let's take a closer look at those properties:

  • states will return a list of all available states by calling State.getList({})
  • state is a string property set to null by default (no selection).
  • cities will return null if no state has been selected. Otherwise, it will load all the cities for a given state by sending state as a query paramater (which will make a request like http://localhost:8080/api/cities?state=IL)
  • city is a string, set to null by default. It listens to itself being set and resolves to that value. Additionally it listens to state and resolves back to null when it changes.
  • restaurants will always be null unless both a city and a state are selected. If both are selected, it will set the address.state and address.city query parameters which will return a list of all restaurants whose address matches those parameters.

Create a test

View models that are decoupled from the presentation layer are easy to test. We will use QUnit as the testing framework by loading a StealJS-friendly wrapper (steal-qunit). The component generator created a fully working test page for the component, which can be opened at http://localhost:8080/src/pages/restaurant/list/test.html. Currently, the tests will fail because we changed the view model, but in this section we will create some unit tests for the new functionality.

Fixtures: Create fake data

Unit tests should be able to run by themselves without the need for an API server. This is where fixtures come in. Fixtures allow us to mock requests to the REST API with data that we can use for tests or demo pages. Default fixtures will be provided for every generated model. Now we'll add more realistic fake data by updating src/models/fixtures/states.js to:

import { fixture } from 'can';
import State from '../state';

const store = fixture.store([
  { name: 'Calisota', short: 'CA' },
  { name: 'New Troy', short: 'NT'}
], State.connection.queryLogic);

fixture('/api/states/{short}', store);

export default store;

Update src/models/fixtures/cities.js to look like:

import { fixture } from 'can';
import City from '../city';

const store = fixture.store([
  { state: 'CA', name: 'Casadina' },
  { state: 'NT', name: 'Alberny' }
], City.connection.queryLogic);

fixture('/api/cities/{name}', store);

export default store;

Update src/models/fixtures/restaurants.js to look like:

import { fixture } from 'can';
import Restaurant from '../restaurant';

const store = fixture.store([{
  _id: 1,
  name: 'Cheese City',
  slug:'cheese-city',
  address: {
    city: 'Casadina',
    state: 'CA'
  },
  images: {
    banner: "node_modules/place-my-order-assets/images/1-banner.jpg",
    owner: "node_modules/place-my-order-assets/images/2-owner.jpg",
    thumbnail: "node_modules/place-my-order-assets/images/3-thumbnail.jpg"
  }
}, {
  _id: 2,
  name: 'Crab Barn',
  slug:'crab-barn',
  address: {
    city: 'Alberny',
    state: 'NT'
  },
  images: {
    banner: "node_modules/place-my-order-assets/images/2-banner.jpg",
    owner: "node_modules/place-my-order-assets/images/3-owner.jpg",
    thumbnail: "node_modules/place-my-order-assets/images/2-thumbnail.jpg"
  }
}], Restaurant.connection.queryLogic);

fixture('/api/restaurants/{_id}', store);

export default store;

Test the view model

With fake data in place, we can test our view model by changing src/pages/restaurant/list/list-test.js to:

import QUnit from 'steal-qunit';
import cityStore from '~/models/fixtures/cities';
import stateStore from '~/models/fixtures/states';
import restaurantStore from '~/models/fixtures/restaurants';
import { ViewModel } from './list';

QUnit.module('~/restaurant/list', {
  beforeEach() {
    localStorage.clear();
  }
});

QUnit.asyncTest('loads all states', function() {
  var vm = new ViewModel();
  var expectedStates = stateStore.getList({});

  vm.states.then(states => {
    QUnit.deepEqual(states.serialize(), expectedStates.data, 'Got all states');
    QUnit.start();
  });
});

QUnit.asyncTest('setting a state loads its cities', function() {
  var vm = new ViewModel();
  var expectedCities = cityStore.getList({ filter: { state: "CA" } }).data;

  QUnit.equal(vm.cities, null, '');
  vm.state = 'CA';
  vm.cities.then(cities => {
    QUnit.deepEqual(cities.serialize(), expectedCities, 'Got all cities');
    QUnit.start();
  });
});

QUnit.asyncTest('changing a state resets city', function() {
  var vm = new ViewModel();
  var expectedCities = cityStore.getList({ filter: { state : "CA" } }).data;

  QUnit.equal(vm.cities, null, '');
  vm.state = 'CA';
  vm.cities.then(cities => {
    QUnit.deepEqual(cities.serialize(), expectedCities, 'Got all cities');
    vm.state = 'NT';
    QUnit.equal(vm.city, null, 'City reset');
    QUnit.start();
  });
});

QUnit.asyncTest('setting state and city loads a list of its restaurants', function() {
  var vm = new ViewModel();
  vm.bind('city', () => {});
  var expectedRestaurants = restaurantStore.getList({
    filter: { address: { city: "Alberny" } }
  }).data;

  vm.state = 'NT';
  vm.city = 'Alberny';

  vm.restaurants.then(restaurants => {
    QUnit.deepEqual(restaurants.serialize(), expectedRestaurants, 'Fetched restaurants equal to expected');
    QUnit.deepEqual(restaurants.length, 1, 'Got expected number of restaurants');
    QUnit.start();
  });
});

These unit tests are comparing expected data (what we we defined in the fixtures) with actual data (how the view model methods are behaving). Visit http://localhost:8080/src/pages/restaurant/list/test.html to see all tests passing.

Write the template

Now that our view model is implemented and tested, we'll update the restaurant list template to support the city/state selection functionality.

Update src/pages/restaurant/list/list.stache to:

<can-import from="can-stache-route-helpers" />

<div class="restaurants">
  <h2 class="page-header">Restaurants</h2>
  <form class="form">
    <div class="form-group">
      <label>State</label>
      <select value:bind="this.state" {{#if(this.states.isPending)}}disabled{{/if}}>
        {{#if(this.states.isPending)}}
          <option value="">Loading...</option>
        {{else}}
          {{^if(this.state)}}
          <option value="">Choose a state</option>
          {{/if}}
          {{#for(state of this.states.value)}}
          <option value="{{state.short}}">{{state.name}}</option>
          {{/for}}
        {{/if}}
      </select>
    </div>
    <div class="form-group">
      <label>City</label>
      <select value:bind="this.city"{{^if(this.state)}}disabled{{/if}}>
        {{#if(this.cities.isPending)}}
          <option value="">Loading...</option>
        {{else}}
          {{#if(this.state)}}
            {{^if(this.city)}}
            <option value="">Choose a city</option>
            {{/if}}
            {{#for(city of this.cities.value)}}
            <option value:from="city.name">{{city.name}}</option>
            {{/for}}
          {{/if}}
        {{/if}}
      </select>
    </div>
  </form>

  {{#if(this.restaurants.isPending)}}
    <div class="restaurant loading"></div>
  {{/if}}

  {{#if(this.restaurants.isResolved)}}
    {{console.log("count", this.restaurants.value.length)}}
    {{#for(restaurant of this.restaurants.value)}}
      {{let addr=restaurant.address}}

      <div class="restaurant">
        <img src="{{joinBase(restaurant.images.thumbnail)}}"
          width="100" height="100">
        <h3>{{restaurant.name}}</h3>

        {{#if(addr)}}
        <div class="address">
          {{addr.street}}<br />{{addr.city}}, {{addr.state}} {{addr.zip}}
        </div>
        {{/if}}

        <div class="hours-price">
          $$$<br />
          Hours: M-F 10am-11pm
          <span class="open-now">Open Now</span>
        </div>

        <a class="btn" href="{{routeUrl(page='restaurants' slug=restaurant.slug)}}">
          Details
        </a>
        <br />
      </div>
    {{/for}}
  {{/if}}
</div>

Some things worth pointing out:

  • Since states and cities return a promise, we can check the promise's status via isResolved and isPending and once resolved get the actual value with states.value and cities.value. This also allows us to easily show loading indicators and disable the select fields while loading data.
  • The state and city properties are two-way bound to their select fields via value:bind

Now we have a component that lets us select state and city and displays the appropriate restaurant list.

Update the demo page

We already have an existing demo page at src/pages/restaurant/list/list.html. We'll update it to load fixtures so it can demonstrate the use of the pmo-restaurnt-list component:

<script src="../../../../node_modules/steal/steal.js"></script>
<script type="steal-module">
  import PmoRestaurantList from "~/pages/restaurant/list/";
  import "place-my-order-assets";
  import "~/models/fixtures/";

  let pmoRestaurantList = new PmoRestaurantList({
    viewModel: {}
  });

  document.body.appendChild(pmoRestaurantList.element);
</script>

View the demo page at http://localhost:8080/src/pages/restaurant/list/list.html .

Automated tests

In this chapter we will automate running the tests so that they can be run from from the command line.

Using the global test page

We already worked with an individual component test page in src/pages/restaurant/list/test.html but we also have a global test page available at test.html. All tests are being loaded in src/test.js. Since we don't have tests for our models at the moment, let's remove the import 'place-my-order/models/test'; part so that src/test.js looks like this:

import F from 'funcunit';
import QUnit from 'steal-qunit';

import '~/pages/restaurant/list/list-test';

F.attach(QUnit);

QUnit.module('place-my-order functional smoke test', {
  beforeEach() {
    F.open('./development.html');
  }
});

QUnit.test('place-my-order main page shows up', function() {
  F('title').text('place-my-order', 'Title is set');
});

If you now go to http://localhost:8080/test.html we still see all restaurant list tests passing but we will add more here later on.

Using a test runner

Note: If you are using Firefox for development, close the browser temporarily so that we can run our tests.

The tests can be automated with any test runner that supports running QUnit tests. We will use Testee which makes it easy to run those tests in any browser from the command line without much configuration. In fact, everything needed to automatically run the test.html page in Firefox is already set up and we can launch the tests by running:

donejs test

To see the tests passing on the command line.

Continuous integration

Now that the tests can be run from the command line we can automate it in a continuous integration (CI) environment to run all tests whenever a code change is made. We will use GitHub to host our code and TravisCI as the CI server.

Creating a GitHub account and repository

If you don't have an account yet, go to GitHub to sign up and follow the help on how to set it up for use with the command-line git. Once completed, you can create a new repository from your dashboard. Calling the repository place-my-order and initializing it empty (without any of the default files) looks like this:

Creating a new repository on GitHub

Now we have to initialize Git in our project folder and add the GitHub repository we created as the origin remote (replace <your-username> with your GitHub username):

git init
git remote add origin https://github.com/<your-username>/place-my-order.git

Then we can add all files and push to origin like this:

git add --all
git commit -am "Initial commit"
git push origin master

If you now go to github.com/<your-username>/place-my-order you will see the project files in the repository.

Setting up Travis CI

The way our application is set up, now all a continuous integration server has to do is clone the application repository, run npm install, and then run npm test. There are many open source CI servers, the most popular one probably Jenkins, and many hosted solutions like Travis CI.

We will use Travis as our hosted solution because it is free for open source projects. It works with your GitHub account which it will use to sign up. First, sign up, then go to Accounts (in the dropdown under you name) to enable the place-my-order repository:

Enabling the repository on Travis CI

Continuous integration on GitHub is most useful when using branches and pull requests. That way your main branch (master) will only get new code changes if all tests pass. Let's create a new branch with

git checkout -b travis-ci

Run the donejs-travis generator to add a .travis.yml file to our project root, and to add a Build Passing badge to the top of readme.md:

donejs add travis

When prompted, confirm the GitHub user name and repository by pressing the Enter key, you can also enter new values if needed:

? What is the GitHub owner name? (<your-username>)
? What is the GitHub repository name? (place-my-order)

Following these questions, the generator will first update the package.json's repository field to point it to where your code lives.

Confirm the changes by pressing the Enter key,

 conflict package.json
? Overwrite package.json? (Ynaxdh)

You can also press the d key to see a diff of the changes before writing to the file.

Then, the generator creates a .travis.yml file and updates readme.md to include a badge indicating the status of the build, confirm the changes by pressing the Enter key:

conflict README.md
? Overwrite README.md? (Ynaxdh)

The generated .travis.yml should look like this:

language: node_js
node_js: node
addons:
  firefox: latest
before_install:
  - 'export DISPLAY=:99.0'
  - sh -e /etc/init.d/xvfb start

By default Travis CI runs npm test for NodeJS projects which is what we want. before_install sets up a window system to run Firefox.

To see Travis run, let's add all changes and push to the branch:

git add --all
git commit -am "Enabling Travis CI"
git push origin travis-ci

And then create a new pull request by going to github.com/<your-username>/place-my-order which will now show an option for it:

Creating a new pull request on GitHub

Once you created the pull request, you will see a Some checks haven’t completed yet message that will eventually turn green like this:

Merging a pull request with all tests passed

Once everything turns green, click the "Merge pull request" button. Then in your console, checkout the master branch and pull down it's latest with:

git checkout master
git pull origin master

Nested routes

In this section, we will add additional pages that are shown under nested urls such as restaurants/cheese-curd-city/order.

Until now we've used three top level routes: home, restaurants and order-history. We did however also define two additional routes in src/app.js which looked like:

route.register('{page}/{slug}', { slug: null });
route.register('{page}/{slug}/{action}', { slug: null, action: null });

We want to use those routes when we are in the restaurants page. The relevant section in pageComponent currently looks like this:

case 'restaurants': {
  return steal.import('~/pages/restaurant/list/').then(({default: RestaurantList}) => {
    return new RestaurantList();
  });
}

We want to support two additional routes:

  • restaurants/{slug}, which shows a details page for the restaurant with slug being a URL friendly short name for the restaurant
  • restaurants/{slug}/order, which shows the menu of the current restaurant and allows us to make a selection and then send our order.

Create additional components

To make this happen, we need two more components. First, the pmo-restaurant-details component which loads the restaurant (based on the slug) and displays its information.

donejs add component pages/restaurant/details.component pmo-restaurant-details

And change src/pages/restaurant/details.component to:

<can-component tag="pmo-restaurant-details">
  <style type="less">
    display: block;

    p { font-weight: bold; }
  </style>
  <view>
    <can-import from="~/models/restaurant" />
    <can-import from="can-stache-route-helpers" />
    {{#if(this.restaurantPromise.isPending)}}
      <div class="loading"></div>
    {{else}}
      {{let restaurant=this.restaurantPromise.value}}
      <div class="restaurant-header"
          style="background-image: url({{joinBase(restaurant.images.banner)}});">
        <div class="background">
          <h2>{{restaurant.name}}</h2>

          {{let addr=restaurant.address}}
          {{#if(addr)}}
          <div class="address">
            {{addr.street}}<br />{{addr.city}}, {{addr.state}} {{addr.zip}}
          </div>
          {{/if}}

          <div class="hours-price">
            $$$<br />
            Hours: M-F 10am-11pm
            <span class="open-now">Open Now</span>
          </div>

          <br />
        </div>
      </div>

      <div class="restaurant-content">
        <h3>The best food this side of the Mississippi</h3>

        <p class="description">
          <img src="{{joinBase(restaurant.images.owner)}}" />
          Description for {{restaurant.name}}
        </p>
        <p class="order-link">
          <a class="btn" href="{{routeUrl(page='restaurants' slug=restaurant.slug action='order')}}">
            Order from {{restaurant.name}}
          </a>
        </p>
      </div>
    {{/if}}
  </view>
  <script type="view-model">
    import { DefineMap } from 'can';
    import Restaurant from '~/models/restaurant';

    export default DefineMap.extend("PmoRestaurantDetailsVM", {
      // EXTERNAL STATEFUL PROPERTIES
      // These properties are passed from another component. Example:
      // value: {type: "number"}

      // INTERNAL STATEFUL PROPERTIES
      // These properties are owned by this component.
      message: { default: "This is the pmo-restaurant-details component" },

      // DERIVED PROPERTIES
      // These properties combine other property values. Example:
      // get valueAndMessage(){ return this.value + this.message; }
      get restaurantPromise() {
        return Restaurant.get({ _id: this.slug });
      },

      // METHODS
      // Functions that can be called by the view. Example:
      // incrementValue() { this.value++; }

      // SIDE EFFECTS
      // The following is a good place to perform changes to the DOM
      // or do things that don't fit in to one of the areas above.
      connectedCallback(element){

      }
    });
  </script>
</can-component>

The order component will be a little more complex, which is why we will put it into its own folder:

donejs add component pages/order/new pmo-order-new

For now, we will just use placeholder content and implement the functionality in the following chapters.

Add to the Application ViewModel routing

Now we can add those components to the pageComponent property (at src/app.js) with conditions based on the routes that we want to match. Update src/app.js with:

import { DefineMap, route, value } from 'can';
import RoutePushstate from 'can-route-pushstate';
import debug from 'can-debug#?./is-dev';

//!steal-remove-start
if(debug) {
    debug();
}
//!steal-remove-end

const AppViewModel = DefineMap.extend("AppViewModel", {
  page: 'string',
  slug: 'string',
  action: 'string',
  env: {
    default: () => ({NODE_ENV:'development'})
  },
  title: {
    default: 'place-my-order'
  },
  routeData: {
    default: () => route.data
    },
  get pageComponent() {
    switch(this.routeData.page) {
      case 'home': {
        return steal.import('~/pages/home.component').then(({default: Home}) => {
          return new Home();
        });
      }

      case 'restaurants': {
        if(this.routeData.slug) {
          switch(this.routeData.action) {
            case 'order': {
              return steal.import("~/pages/order/new/")
              .then(({default: OrderNew}) => {
                return new OrderNew({
                  viewModel: {
                    slug: value.from(this.routeData, "slug")
                  }
                })
              });
            }

            default: {
              return steal.import("~/pages/restaurant/details.component")
              .then(({default: RestaurantDetail}) => {
                return new RestaurantDetail({
                  viewModel: {
                    slug: value.from(this.routeData, "slug")
                  }
                });
              });
            }
          }
        }

        return steal.import('~/pages/restaurant/list/').then(({default: RestaurantList}) => {
          return new RestaurantList();
        });
      }

      case 'order-history': {
        return steal.import('~/pages/order/history.component').then(({default: OrderHistory}) => {
          return new OrderHistory();
        });
      }
    }
  }
});

route.urlData = new RoutePushstate();
route.register("{page}", { page: "home" });
route.register('{page}/{slug}', { slug: null });
route.register('{page}/{slug}/{action}', { slug: null, action: null });

export default AppViewModel;

Here we are adding some more conditions if page is set to restaurants:

  • When there is no slug set, show the original restaurant list
  • When slug is set but no action, show the restaurant details
  • When slug is set and action is order, show the order component for that restaurant

As before, we import the page component based on the state of the route. Since the page component is a class, we can call new to create a new instance. Then we use can-value to bind the slug from the route to the component.

Importing other projects

The npm integration of StealJS makes it very easy to share and import other components. One thing we want to do when showing the pmo-order-new component is have a tab to choose between the lunch and dinner menu. The good news is that there is already a bit-tabs component which does exactly that. Let's add it as a project dependency with:

npm install bit-tabs@2 --save

And then integrate it into src/pages/order/new/new.stache:

<can-import from="bit-tabs/unstyled"/>
<div class="order-form">
  <h2>Order here</h2>

  <bit-tabs tabsClass:raw="nav nav-tabs">
    <bit-panel title:raw="Lunch menu">
      This is the lunch menu
    </bit-panel>
    <bit-panel title:raw="Dinner menu">
      This is the dinner menu
    </bit-panel>
  </bit-tabs>
</div>

Here we just import the unstyled module from the bit-tabs package using can-import which will then provide the bit-tabs and bit-panel custom elements.

Creating data

In this section, we will update the order component to be able to select restaurant menu items and submit a new order for a restaurant.

Creating the order model

First, let's look at the restaurant data we get back from the server. It looks like this:

{
  "_id": "5571e03daf2cdb6205000001",
  "name": "Cheese Curd City",
  "slug": "cheese-curd-city",
  "images": {
    "thumbnail": "images/1-thumbnail.jpg",
    "owner": "images/1-owner.jpg",
    "banner": "images/2-banner.jpg"
  },
  "menu": {
    "lunch": [
      {
        "name": "Spinach Fennel Watercress Ravioli",
        "price": 35.99
      },
      {
        "name": "Chicken with Tomato Carrot Chutney Sauce",
        "price": 45.99
      },
      {
        "name": "Onion fries",
        "price": 15.99
      }
    ],
    "dinner": [
      {
        "name": "Gunthorp Chicken",
        "price": 21.99
      },
      {
        "name": "Herring in Lavender Dill Reduction",
        "price": 45.99
      },
      {
        "name": "Roasted Salmon",
        "price": 23.99
      }
    ]
  },
  "address": {
    "street": "1601-1625 N Campbell Ave",
    "city": "Green Bay",
    "state": "WI",
    "zip": "60045"
  }
}

We have a menu property which provides a lunch and dinner option (which will show later inside the tabs we set up in the previous chapter). We want to be able to add and remove items from the order, check if an item is in the order already, set a default order status (new), and be able to calculate the order total. For that to happen, we need to create a new item model:

import { DefineMap, DefineList} from 'can';

export const Item = DefineMap.extend({
  seal: false
}, {
  price: 'number'
});

export const ItemsList = DefineList.extend({
  '#': Item,
  has: function(item) {
    return this.indexOf(item) !== -1;
  },

  toggle: function(item) {
    var index = this.indexOf(item);

    if (index !== -1) {
      this.splice(index, 1);
    } else {
      this.push(item);
    }
  }
});

And generate order model:

donejs add supermodel order

Like the restaurant model, the URL is /api/orders and the id property is _id. To select menu items, we need to add some additional functionality to src/models/order.js:

import { DefineMap, DefineList, superModel } from 'can';
import loader from '@loader';
import { ItemsList } from "./item";

const Order = DefineMap.extend('Order', {
  seal: false
}, {
  '_id': {
    type: 'any',
    identity: true
  },
  name: 'string',
  address: 'string',
  phone: 'string',
  restaurant: 'string',

  status: {
    default: 'new'
  },
  items: {
    Default: ItemsList
  },
  get total() {
    let total = 0.0;
    this.items.forEach(item =>
        total += parseFloat(item.price));
    return total.toFixed(2);
  },
  markAs(status) {
    this.status = status;
    this.save();
  }
});

Order.List = DefineList.extend('OrderList', {
  '#': Order
});

Order.connection = superModel({
  url: loader.serviceBaseURL + '/api/orders',
  Map: Order,
  List: Order.List,
  name: 'order'
});

export default Order;

Add menu property to the restaurant model in src/models/restaurant.js:

import { DefineMap, DefineList, superModel } from 'can';
import loader from '@loader';
import { ItemsList } from "./item";

const Restaurant = DefineMap.extend({
  seal: false
}, {
  '_id': {
    type: 'any',
    identity: true
  },
  menu:{
    type: {
      lunch: {
        Type: ItemsList
      },
      dinner: {
        Type: ItemsList
      }
    }
  }
});

Restaurant.List = DefineList.extend({
  '#': Restaurant
});

Restaurant.connection = superModel({
  url: loader.serviceBaseURL + '/api/restaurants',
  Map: Restaurant,
  List: Restaurant.List,
  name: 'restaurant'
});

export default Restaurant;

Here we define an ItemsList which allows us to toggle menu items and check if they are already in the order. We set up ItemsList as the Value of the items property of an order so we can use its has function and toggle directly in the template. We also set a default value for status and a getter for calculating the order total which adds up all the item prices. We also create another <order-model> tag to load orders in the order history template later.

Implement the view model

Now we can update the view model in src/pages/order/new/new.js:

import { Component } from 'can';
import './new.less';
import view from './new.stache';
import Restaurant from '~/models/restaurant';
import Order from '~/models/order';

export const PmoOrderNew = Component.extend({
  tag: 'pmo-order-new',
  view,
  ViewModel: {
    // EXTERNAL STATEFUL PROPERTIES
    // These properties are passed from another component. Example:
    // value: {type: "number"}
    slug: 'string',

    // INTERNAL STATEFUL PROPERTIES
    // These properties are owned by this component.
    saveStatus: '*',
    order: {
      Default: Order
    },
    get restaurantPromise() {
      return Restaurant.get({ _id: this.slug });
    },
    restaurant: {
      get(lastSetVal, resolve) {
        this.restaurantPromise.then(resolve);
      }
    },
    get canPlaceOrder() {
      return this.order.items.length;
    },

    // DERIVED PROPERTIES
    // These properties combine other property values. Example:
    // get valueAndMessage(){ return this.value + this.message; }

    // METHODS
    // Functions that can be called by the view. Example:
    // incrementValue() { this.value++; }
    placeOrder(ev) {
      ev.preventDefault();
      let order = this.order;
      order.restaurant = this.restaurant._id;
      this.saveStatus = order.save();
    },
    startNewOrder() {
      this.order = new Order();
      this.saveStatus = null;
    },

    // SIDE EFFECTS
    // The following is a good place to perform changes to the DOM
    // or do things that don't fit in to one of the areas above.
    connectedCallback(element){

    }
  }
});

export default PmoOrderNew;
export const ViewModel = PmoOrderNew.ViewModel;

Here we just define the properties that we need: slug, order, canPlaceOrder - which we will use to enable/disable the submit button - and saveStatus, which will become a promise once the order is submitted. placeOrder updates the order with the restaurant information and saves the current order. startNewOrder allows us to submit another order.

While we're here we can also update our test to get it passing again, replace src/pages/order/new/new-test.js with:

import QUnit from 'steal-qunit';
import { ViewModel } from './new';

// ViewModel unit tests
QUnit.module('~/pages/order/new');

QUnit.test('canPlaceOrder', function(){
  var vm = new ViewModel({
    order: { items: [1] }
  });
  QUnit.equal(vm.canPlaceOrder, true, 'can place an order');
});

Write the template

First, let's implement a small order confirmation component with

donejs add component components/order/details.component pmo-order-details

and changing src/components/order/details.component to:

<can-component tag="pmo-order-details">
  <view>
    {{#if(this.order)}}
      <h3>Thanks for your order {{this.order.name}}!</h3>
      <div><label class="control-label">
        Confirmation Number: {{this.order._id}}</label>
      </div>

      <h4>Items ordered:</h4>
      <ul class="list-group panel">
        {{#for(item of this.order.items)}}
          <li class="list-group-item">
            <label>
              {{item.name}} <span class="badge">${{item.price}}</span>
            </label>
          </li>
        {{/for}}

        <li class="list-group-item">
          <label>
            Total <span class="badge">${{this.order.total}}</span>
          </label>
        </li>
      </ul>

      <div><label class="control-label">
        Phone: {{this.order.phone}}
      </label></div>
      <div><label class="control-label">
        Address: {{this.order.address}}
      </label></div>
    {{/if}}
  </view>
  <script type="view-model">
    import { DefineMap } from 'can';

    export default DefineMap.extend("PmoOrderDetailsVM", {
      // EXTERNAL STATEFUL PROPERTIES
      // These properties are passed from another component. Example:
      // value: {type: "number"}
      order: "any",

      // INTERNAL STATEFUL PROPERTIES
      // These properties are owned by this component.
      message: { default: "This is the pmo-order-details component" },

      // DERIVED PROPERTIES
      // These properties combine other property values. Example:
      // get valueAndMessage(){ return this.value + this.message; }

      // METHODS
      // Functions that can be called by the view. Example:
      // incrementValue() { this.value++; }

      // SIDE EFFECTS
      // The following is a good place to perform changes to the DOM
      // or do things that don't fit in to one of the areas above.
      connectedCallback(element){

      }
    });
  </script>
</can-component>

Now we can import that component and update src/pages/order/new/new.stache to:

<can-import from="bit-tabs/unstyled"/>
<can-import from="~/components/order/details.component" />

<div class="order-form">
  {{#if(this.restaurantPromise.isPending)}}
    <div class="loading"></div>
  {{else}}
    {{#if(this.saveStatus.isResolved)}}
      <pmo-order-details order:from="this.saveStatus.value"></pmo-order-details>
      <p><a href="javascript://" on:click="this.startNewOrder()">
        Place another order
      </a></p>
    {{else}}
      <h3>Order from {{this.restaurant.name}}</h3>

      <form on:submit="this.placeOrder(scope.event)">
        <bit-tabs tabsClass:raw="nav nav-tabs">
          <p class="info {{^if(this.order.items.length)}}text-error{{else}}text-success{{/if}}">
            {{^if(this.order.items.length)}}
              Please choose an item
            {{else}}
              {{this.order.items.length}} selected
            {{/if}}
          </p>
          <bit-panel title:raw="Lunch menu">
            <ul class="list-group">
              {{#for(item of this.restaurant.menu.lunch)}}
                <li class="list-group-item">
                  <label>
                    <input type="checkbox"
                      on:change="this.order.items.toggle(item)"
                      {{#if(this.order.items.has(item))}}checked{{/if}}>
                    {{item.name}} <span class="badge">${{item.price}}</span>
                  </label>
                </li>
              {{/for}}
            </ul>
          </bit-panel>
          <bit-panel title:raw="Dinner menu">
            <ul class="list-group">
              {{#for(item of restaurant.menu.dinner)}}
                <li class="list-group-item">
                  <label>
                    <input type="checkbox"
                      on:change="this.order.items.toggle(item)"
                      {{#if(this.order.items.has(item))}}checked{{/if}}>
                    {{item.name}} <span class="badge">${{item.price}}</span>
                  </label>
                </li>
              {{/for}}
            </ul>
          </bit-panel>
        </bit-tabs>

        <div class="form-group">
          <label class="control-label">Name:</label>
          <input name="name" type="text" class="form-control"
            value:bind="this.order.name">
          <p>Please enter your name.</p>
        </div>
        <div class="form-group">
          <label class="control-label">Address:</label>
          <input name="address" type="text" class="form-control"
            value:bind="this.order.address">
          <p class="help-text">Please enter your address.</p>
        </div>
        <div class="form-group">
          <label class="control-label">Phone:</label>
          <input name="phone" type="text" class="form-control"
            value:bind="this.order.phone">
          <p class="help-text">Please enter your phone number.</p>
        </div>
        <div class="submit">
          <h4>Total: ${{this.order.total}}</h4>
          {{#if(this.saveStatus.isPending)}}
            <div class="loading"></div>
          {{else}}
            <button type="submit"
                {{^if(this.canPlaceOrder)}}disabled{{/if}} class="btn">
              Place My Order!
            </button>
          {{/if}}
        </div>
      </form>
    {{/if}}
  {{/if}}
</div>

This is a longer template so lets walk through it:

  • <can-import from="place-my-order/order/details.component" /> loads the order details component we previously created
  • If the saveStatus promise is resolved we show the pmo-order-details component with that order
  • Otherwise we will show the order form with the bit-tabs panels we implemented in the previous chapter and iterate over each menu item
  • on:submit="this.placeOrder()" will call placeOrder from our view model when the form is submitted
  • The interesting part for showing a menu item is the checkbox <input type="checkbox" on:change="this.order.items.toggle(item)" {{#if this.order.items.has(item)}}checked{{/if}}>
    • on:change binds to the checkbox change event and runs this.order.items.toggle which toggles the item from ItemList, which we created in the model
    • this.order.item.has sets the checked status to whether or not this item is in the order
  • Then we show form elements for name, address, and phone number, which are bound to the order model using can-stache-bindings
  • Finally we disable the button with {{^if(this.canPlaceOrder)}}disabled{{/if}} which gets canPlaceOrder from the view model and returns false if no menu items are selected.

Set up a real-time connection

can-connect makes it very easy to implement real-time functionality. It is capable of listening to notifications from the server when server data has been created, updated, or removed. This is usually accomplished via websockets, which allow sending push notifications to a client.

Add the Status enum type

Update src/models/order.js to use QueryLogic.makeEnum so that we can declare all of the possible values for an order's status.

import { DefineMap, DefineList, superModel, QueryLogic } from 'can';
import loader from '@loader';

const Status = QueryLogic.makeEnum(["new", "preparing", "delivery", "delivered"]);

const Order = DefineMap.extend('Order', {
  seal: false
}, {
  '_id': {
    type: 'any',
    identity: true
  },
  name: 'string',
  address: 'string',
  phone: 'string',
  restaurant: 'string',

  status: {
    default: 'new',
    Type: Status
  },
  items: {
    Default: ItemsList
  },
  get total() {
    let total = 0.0;
    this.items.forEach(item =>
        total += parseFloat(item.price));
    return total.toFixed(2);
  },
  markAs(status) {
    this.status = status;
    this.save();
  }
});

Order.List = DefineList.extend('OrderList', {
  '#': Order
});

Order.connection = superModel({
  url: loader.serviceBaseURL + '/api/orders',
  Map: Order,
  List: Order.List,
  name: 'order'
});

export default Order;

Update the template

First let's create the pmo-order-list component with:

donejs add component components/order/list.component pmo-order-list

And then change src/components/order/list.component to:

<can-component tag="pmo-order-list">
  <view>
    <h4>{{this.listTitle}}</h4>

    {{#if(this.orders.isPending)}}
     <div class="loading"></div>
    {{else}}
      {{#for(order of this.orders.value)}}
      <div class="order {{order.status}}">
        <address>
          {{order.name}} <br />{{order.address}} <br />{{order.phone}}
        </address>

        <div class="items">
          <ul>
            {{#for(item of order.items)}}<li>{{item.name}}</li>{{/for}}
          </ul>
        </div>

        <div class="total">${{order.total}}</div>

        <div class="actions">
          <span class="badge">{{this.statusTitle}}</span>
          {{#if(this.action)}}
            <p class="action">
              Mark as:
              <a href="javascript://" on:click="order.markAs(this.action)">
                {{this.actionTitle}}
              </a>
            </p>
          {{/if}}

          <p class="action">
            <a href="javascript://"  on:click="order.destroy()">Delete</a>
          </p>
        </div>
      </div>
      {{else}}
        <div class="order empty">{{this.emptyMessage}}</div>
      {{/for}}
    {{/if}}
  </view>
  <script type="view-model">
    import { DefineMap } from 'can';

    export default DefineMap.extend("PmoOrderListVM", {
      // EXTERNAL STATEFUL PROPERTIES
      // These properties are passed from another component. Example:
      // value: {type: "number"}
      orders: "any",
      listTitle: "string",
      status: "string",
      statusTitle: "string",
      action: "string",
      actionTitle: "string",
      emptyMessage: "string",

      // INTERNAL STATEFUL PROPERTIES
      // These properties are owned by this component.

      // DERIVED PROPERTIES
      // These properties combine other property values. Example:
      // get valueAndMessage(){ return this.value + this.message; }

      // METHODS
      // Functions that can be called by the view. Example:
      // incrementValue() { this.value++; }

      // SIDE EFFECTS
      // The following is a good place to perform changes to the DOM
      // or do things that don't fit in to one of the areas above.
      connectedCallback(element){

      }
    });
  </script>
</can-component>

Also update the order history template by changing src/pages/order/history.component to:

<can-component tag="pmo-order-history">
  <view>
    <can-import from="~/components/order/list.component" />
    <div class="order-history">
      <div class="order header">
        <address>Name / Address / Phone</address>
        <div class="items">Order</div>
        <div class="total">Total</div>
        <div class="actions">Action</div>
      </div>

      <pmo-order-list
        orders:from="this.statusNew"
        listTitle:raw="New Orders"
        status:raw="new"
        statusTitle:raw="New Order!"
        action:raw="preparing"
        actionTitle:raw="Preparing"
        emptyMessage:raw="No new orders"/>

      <pmo-order-list
        orders:from="this.statusPreparing"
        listTitle:raw="Preparing"
        status:raw="preparing"
        statusTitle:raw="Preparing"
        action:raw="delivery"
        actionTitle:raw="Out for delivery"
        emptyMessage:raw="No orders preparing"/>

      <pmo-order-list
        orders:from="this.statusDelivery"
        listTitle:raw="Out for delivery"
        status:raw="delivery"
        statusTitle:raw="Out for delivery"
        action:raw="delivered"
        actionTitle:raw="Delivered"
        emptyMessage:raw="No orders are being delivered"/>

      <pmo-order-list
        orders:from="this.statusDelivered"
        listTitle:raw="Delivered"
        status:raw="delivered"
        statusTitle:raw="Delivered"
        emptyMessage:raw="No delivered orders"/>
    </div>
  </view>
  <script type="view-model">
    import { DefineMap } from 'can';
    import Order from '~/models/order';

    export default DefineMap.extend("PmoOrderHistoryVM", {
      // EXTERNAL STATEFUL PROPERTIES
      // These properties are passed from another component. Example:
      // value: {type: "number"}

      // INTERNAL STATEFUL PROPERTIES
      // These properties are owned by this component.
      message: { default: "This is the pmo-order-history component" },

      // DERIVED PROPERTIES
      // These properties combine other property values. Example:
      // get valueAndMessage(){ return this.value + this.message; }
      get statusNew() {
        return Order.getList({ filter: { status: "new" }});
      },
      get statusPreparing() {
        return Order.getList({ filter: { status: "preparing" }});
      },
      get statusDelivery() {
        return Order.getList({ filter: { status: "delivery" }});
      },
      get statusDelivered() {
        return Order.getList({ filter: { status: "delivered" }});
      },

      // METHODS
      // Functions that can be called by the view. Example:
      // incrementValue() { this.value++; }

      // SIDE EFFECTS
      // The following is a good place to perform changes to the DOM
      // or do things that don't fit in to one of the areas above.
      connectedCallback(element){

      }
    });
  </script>
</can-component>

First we import the order model and then just call <order-model get-list="{status='<status>'}"> for each order status. These are all of the template changes needed, next is to set up the real-time connection.

Adding real-time events to a model

The place-my-order-api module uses the Feathers NodeJS framework, which in addition to providing a REST API, sends those events in the form of a websocket event like orders created. To make the order page update in real-time, all we need to do is add listeners for those events to src/models/order.js and in the handler notify the order connection.

npm install steal-socket.io@4 --save

Update src/models/order.js to use socket.io to update the Order model in real-time:

import { DefineMap, DefineList, superModel, QueryLogic } from 'can';
import loader from '@loader';
import io from 'steal-socket.io';

const Status = QueryLogic.makeEnum(["new", "preparing", "delivery", "delivered"]);

const Order = DefineMap.extend('Order', {
  seal: false
}, {
  '_id': {
    type: 'any',
    identity: true
  },
  name: 'string',
  address: 'string',
  phone: 'string',
  restaurant: 'string',

  status: {
    default: 'new',
    Type: Status
  },
  items: {
    Default: ItemsList
  },
  get total() {
    let total = 0.0;
    this.items.forEach(item =>
        total += parseFloat(item.price));
    return total.toFixed(2);
  },
  markAs(status) {
    this.status = status;
    this.save();
  }
});

Order.List = DefineList.extend('OrderList', {
  '#': Order
});

Order.connection = superModel({
  url: loader.serviceBaseURL + '/api/orders',
  Map: Order,
  List: Order.List,
  name: 'order'
});

const socket = io(loader.serviceBaseURL);

socket.on('orders created', order => Order.connection.createInstance(order));
socket.on('orders updated', order => Order.connection.updateInstance(order));
socket.on('orders removed', order => Order.connection.destroyInstance(order));

export default Order;

That's it. If we now open the order page we see some already completed default orders. Keeping the page open and placing a new order from another browser or device will update our order page automatically.

Create documentation

Documenting our code is very important to quickly get other developers up to speed. DocumentJS makes documenting code easier. It will generate a full documentation page from Markdown files and code comments in our project.

Installing and Configuring DocumentJS

Let's add DocumentJS to our application:

donejs add documentjs@0.1

This will install DocumentJS and also create a documentjs.json configuration file. Now we can generate the documentation with:

donejs document

This produces documentation at http://localhost:8080/docs/.

Documenting a module

Let's add the documentation for a module. Let's use src/pages/order/new/new.js and update it with some inline comments that describe what our view model properties are supposed to do:

import { Component } from 'can';
import './new.less';
import view from './new.stache';
import Restaurant from '~/models/restaurant';
import Order from '~/models/order';

export const PmoOrderNew = Component.extend({
  tag: 'pmo-order-new',
  view,

  /**
   * @add ~/pages/order/new
   */
  ViewModel: {
    // EXTERNAL STATEFUL PROPERTIES
    // These properties are passed from another component. Example:
    // value: {type: "number"}

    /**
     * @property {string} slug
     *
     * the restaurants slug (short name). will
     * be used to request the actual restaurant.
     */
    slug: 'string',

    // INTERNAL STATEFUL PROPERTIES
    // These properties are owned by this component.

    /**
      * @property {Promise} saveStatus
      *
      * a Promise that contains the status of the order when
      * it is being saved.
      */
    saveStatus: '*',
    /**
     * @property {~/models/order} order
     *
     * the order that is being processed. will
     * be an empty new order inititally.
     */
    order: {
      Default: Order
    },
    /**
      * @property {Promise} restaurantPromise
      *
      * a Promise that contains the restaurant that is being
      * ordered from.
      */
    get restaurantPromise() {
      return Restaurant.get({ _id: this.slug });
    },
    /**
     * @property {~/models/restaurant} restaurant
     *
     * the restaurant that is being ordered from.
     */
    restaurant: {
      get(lastSetVal, resolve) {
        this.restaurantPromise.then(resolve);
      }
    },
    /**
      * @property {Boolean} canPlaceOrder
      *
      * boolean indicating whether the order
      * can be placed.
      */
    get canPlaceOrder() {
      return this.order.items.length;
    },

    // DERIVED PROPERTIES
    // These properties combine other property values. Example:
    // get valueAndMessage(){ return this.value + this.message; }

    // METHODS
    // Functions that can be called by the view. Example:
    // incrementValue() { this.value++; }

    /**
     * @function placeOrder
     *
     * save the current order and update the status deferred.
     */
    placeOrder(ev) {
      ev.preventDefault();
      let order = this.order;
      order.restaurant = this.restaurant._id;
      this.saveStatus = order.save();
    },
    /**
     * @function startNewOrder
     *
     * resets the order form, so a new order can be placed.
     */
    startNewOrder() {
      this.order = new Order();
      this.saveStatus = null;
    },

    // SIDE EFFECTS
    // The following is a good place to perform changes to the DOM
    // or do things that don't fit in to one of the areas above.
    connectedCallback(element){

    }
  }
});

export default PmoOrderNew;
export const ViewModel = PmoOrderNew.ViewModel;

If we now run donejs document again, we will see the module show up in the menu bar and will be able to navigate through the different properties.

Production builds

Now we're ready to create a production build; go ahead and kill your development server, we won't need it from here on.

Progressive loading

Our app.js contains steal.import() calls for each of the pages we have implemented. These dynamic imports progressively load page components only when the user visits that page.

Bundling assets

Likely you have assets in your project other than your JavaScript and CSS that you will need to deploy to production. Place My Order has these assets saved to another project, you can view them at node_modules/place-my-order-assets/images.

StealTools comes with the ability to bundle all of your static assets into a folder that can be deployed to production by itself. Think if it as a zip file that contains everything your app needs to run in production.

To use this capability add an option to your build script to enable it. Change:

let buildPromise = stealTools.build({
  config: __dirname + "/package.json!npm"
}, {
  bundleAssets: true
});

to:

let buildPromise = stealTools.build({
  config: __dirname + "/package.json!npm"
}, {
  bundleAssets: {
    infer: false,
    glob: "node_modules/place-my-order-assets/images/**/*"
  }
});

StealTools will find all of the assets you reference in your CSS and copy them to the dist folder. By default StealTools will set your dest to dist, and will place the place-my-order-assets images in dist/node_modules/place-my-order/assets/images. bundleAssets preserves the path of your assets so that their locations are the same relative to the base url in both development and production.

Bundling your app

To bundle our application for production we use the build script in build.js. We could also use Grunt or Gulp, but in this example we just run it directly with Node. Everything is set up already so we run:

donejs build

This will build the application to a dist/ folder in the project's base directory.

From here your application is ready to be used in production. Enable production mode by setting the NODE_ENV variable:

NODE_ENV=production donejs start

If you're using Windows omit the NODE_ENV=production in the command, and instead see the setting up guide on how to set environment variables.

Refresh your browser to see the application load in production.

Desktop and mobile apps

Building to iOS and Android

To build the application as a Cordova based mobile application, you need to have each platform's SDK installed. We'll be building an iOS app if you are a Mac user, and an Android app if you're a Windows user.

Mac users should download XCode from the AppStore and install the ios-sim package globally with:

npm install -g ios-sim

We will use these tools to create an iOS application that can be tested in the iOS simulator.

Windows users should install the Android Studio, which gives all of the tools we need. See the setting up guide for full instructions on setting up your Android emulator.

Now we can install the DoneJS Cordova tools with:

donejs add cordova@2

Answer the question about the URL of the service layer with http://www.place-my-order.com.

Depending on your operating system you can accept most of the rest of the defaults, unless you would like to build for Android, which needs to be selected from the list of platforms.

This will change your build.js script with the options needed to build iOS/Android apps. Open this file and add the place-my-order-asset images to the glob property:

let cordovaOptions = {
  buildDir: "./build/cordova",
  id: "com.donejs.placemyorder",
  name: "place my order",
  platforms: ["ios"],
  plugins: ["cordova-plugin-transport-security"],
  index: __dirname + "/production.html",
  glob: [
    "node_modules/place-my-order-assets/images/**/*"
  ]
};

To run the Cordova build and launch the simulator we can now run:

donejs build cordova

If everything went well, we should see the emulator running our application.

Building to Electron

To set up the desktop build, we have to add it to our application like this:

donejs add electron@2

Answer the question about the URL of the service layer with http://www.place-my-order.com. We can answer the rest of the prompts with the default.

Then we can run the build like this:

donejs build electron

The macOS application can be opened with

open build/place-my-order-darwin-x64/place-my-order.app

The Windows application can be opened with

.\build\place-my-order-win32-x64\place-my-order.exe

Deploy

Now that we verified that our application works in production, we can deploy it to the web. In this section, we will use Firebase, a service that provides static file hosting and Content Delivery Network (CDN) support, to automatically deploy and serve our application's static assets from a CDN and Heroku to provide server-side rendering.

Static hosting on Firebase

Sign up for free at Firebase. After you have an account go to Firebase console and create an app called place-my-order-<user> where <user> is your GitHub username:

two browsers

Write down the name of your app's ID because you'll need it in the next section.

You will get an error if your app name is too long, so pick something on the shorter side, for example pmo-<user>.

When you deploy for the first time it will ask you to authorize with your login information, but first we need to configure the project.

Configuring DoneJS

With the Firebase account and application in place we can add the deployment configuration to our project like this:

donejs add firebase@1

When prompted, enter the name of the application created when you set up the Firebase app. Next, login to the firebase app for the first time by running:

node_modules/.bin/firebase login

And authorize your application.

Run deploy

We can now deploy the application by running:

donejs build
donejs deploy

Static files are deployed to Firebase and we can verify that the application is loading from the CDN by loading it running:

NODE_ENV=production donejs start

If you're using Windows, set the NODE_ENV variable as you did previously in the Production section.

We should now see our assets being loaded from the Firebase CDN like this:

A network tab when using the CDN

Deploy your Node code

At this point your application has been deployed to a CDN. This contains StealJS, your production bundles and CSS, and any images or other static files. You still need to deploy your server code in order to get the benefit of server-side rendering.

If you do not have an account yet, sign up for Heroku at signup.heroku.com. Then download the Heroku CLI which will be used to deploy.

After installing run the donejs-heroku generator via:

donejs add heroku

Once you have logged in into your Heroku account, choose whether you want Heroku to use a random name for the application. If you choose not to use a random name, you will be prompted to enter the application name:

We recommend you to use a random name since Heroku fails to create the app if the name is already taken.

? Do you want Heroku to use a random app name? Yes

When prompted, press the Y key since the application requires a proxy

? Does the application require a Proxy? Yes

Then enter http://www.place-my-order.com/api as the proxy url:

? What's the Proxy url? http://www.place-my-order.com/api

Once the generator finishes, update the NODE_ENV variable via:

heroku config:set NODE_ENV=production

and follow the generator instructions to save our current changes:

git add --all
git commit -m "Finishing place-my-order"
git push origin master

Since Heroku needs the build artifacts we need to commit those before pushing to Heroku. We recommend doing this in a separate branch.

git checkout -b deploy
git add -f dist
git commit -m "Deploying to Heroku"

And finally do an initial deploy.

git push heroku deploy:master

Any time in the future you want to deploy simply push to the Heroku remote. Once the deploy is finished you can open the link provided in your browser. If successful we can checkout the master branch:

git checkout master

Continuous Deployment

Previously we set up Travis CI for automated testing of our application code as we developed, but Travis (and other CI solutions) can also be used to deploy our code to production once tests have passed.

In order to deploy to Heroku you need to provide Travis with your Heroku API key. Sensitive information in our .travis.yml should always be encrypted, and the generator takes care of encrypting the API key using the travis-encrypt module.

Note: if using Windows, first install the OpenSSL package as described in the Setting Up guide.

Run the donejs-travis-deploy-to-heroku generator like this:

donejs add travis-deploy-to-heroku

When prompted, confirm each prompt by pressing the Enter key (or enter new values if needed) and then confirm the changes made to the .travis.yml file.

The updated .travis.yml should look like this:

language: node_js
node_js: node
addons:
  firefox: latest
before_install:
  - 'export DISPLAY=:99.0'
  - sh -e /etc/init.d/xvfb start
deploy:
  skip_cleanup: true
  provider: heroku
  app: <heroku-appname>
  api_key: <encrypted-heroku-api-key>
before_deploy:
  - git config --global user.email "me@example.com"
  - git config --global user.name "deploy bot"
  - node build
  - git add dist/ --force
  - git commit -m "Updating build."

The donejs-travis-deploy-to-heroku generator retrieves data from local configuration files, if any of the values set as default is incorrect, you can enter the correct value when prompted. To find the name of the Heroku application run heroku apps:info; or run heroku auth:token if you want to see your authentication token.

Next, we set up Travis CI to deploy to Firebase as well. To automate the deploy to Firebase you need to provide the Firebase CI token. You can get the token by running:

node_modules/.bin/firebase login:ci

In the application folder. It will open a browser window and ask you to authorize the application. Once successful, copy the token and enter it when prompted by the travis-deploy-to-firebase generator.

Run the following command:

donejs add travis-deploy-to-firebase

Confirm your GitHub username and application name, then enter the Firebase CI Token from the previous step:

? What's your GitHub username? <your-username>
? What's your GitHub application name? place-my-order
? What's your Firebase CI Token? <your-firebase-ci-token>

And press the Enter key to update the .travis.yml file which should now look like this:

language: node_js
node_js: node
addons:
  firefox: latest
before_install:
  - 'export DISPLAY=:99.0'
  - sh -e /etc/init.d/xvfb start
deploy:
  skip_cleanup: true
  provider: heroku
  app: <heroku-appname>
  api_key: <encrypted-heroku-api-key>
before_deploy:
  - git config --global user.email "me@example.com"
  - git config --global user.name "deploy bot"
  - node build
  - git add dist/ --force
  - git commit -m "Updating build."
  - 'npm run deploy:ci'
env:
  global:
    - secure: <encrypted-firebase-ci-token>

Now any time a build succeeds when pushing to master the application will be deployed to Heroku and static assets to Firebase's CDN.

To test this out checkout a new branch:

git checkout -b continuous
git add -A
git commit -m "Trying out continuous deployment"
git push origin continuous

Visit your GitHub page, create a pull-request, wait for tests to pass and then merge. Visit your Travis CI build page at https://travis-ci.org/<your-username>/place-my-order to see the deployment happening in real time like this:

The Travis CI deploy

What's next?

In this final short chapter, let's quickly look at what we did in this guide and where to follow up for any questions.

Recap

In this in-depth guide we created and deployed a fully tested restaurant menu ordering application called place-my-order with DoneJS. We learned how to set up a DoneJS project, create custom elements and retrieve data from the server. Then we implemented a unit-tested view-model, ran those tests automatically from the command line and on a continuous integration server.

We went into more detail on how to create nested routes and importing other projects from npm. Then we created new orders and made it real-time, added and built documentation and made a production build. Finally we turned that same application into a desktop and mobile application and deployed it to a CDN and the web.

Following up

You can learn more about each of the individual projects that DoneJS includes at:

  • StealJS - ES6, CJS, and AMD module loader and builder
  • CanJS - Custom elements and Model-View-ViewModel utilities
  • jQuery - DOM helpers
  • jQuery++ - Extended DOM helpers
  • QUnit or Mocha - Assertion library
  • FuncUnit - Functional tests
  • Testee - Test runner
  • DocumentJS - Documentation

If you have any questions, do not hesitate to ask us on Slack (#donejs channel) or the forums!

Help us improve DoneJS by taking our community survey